As a professional gamer who manages team strategies, patch notes, and tournament playbooks, I’ve learned that a project management powerhouse like ClickUp is only as good as the documents you can build inside it. ClickUp Docs (aka Docs 3.0) is my favorite cloud-based word processing tool because it lets me create, edit, share, and collaborate on any type of document without leaving my workspace. Whether I’m jotting down meeting notes, writing a post-match report, drafting a proposal for a sponsor, or building a simple to-do list, ClickUp Docs keeps everything connected to my tasks, lists, and folders. In this guide, I’ll walk you through everything you need to know to get comfortable with the Docs environment and create your first document with confidence.

🚀 Two Ways to Create a New Document
There are two main ways I create a new document in ClickUp.
The first method is to add it as a view. I navigate to a specific Space, Folder, or List, click View on the top navigation, choose Doc from the drop-down list, and click Add.
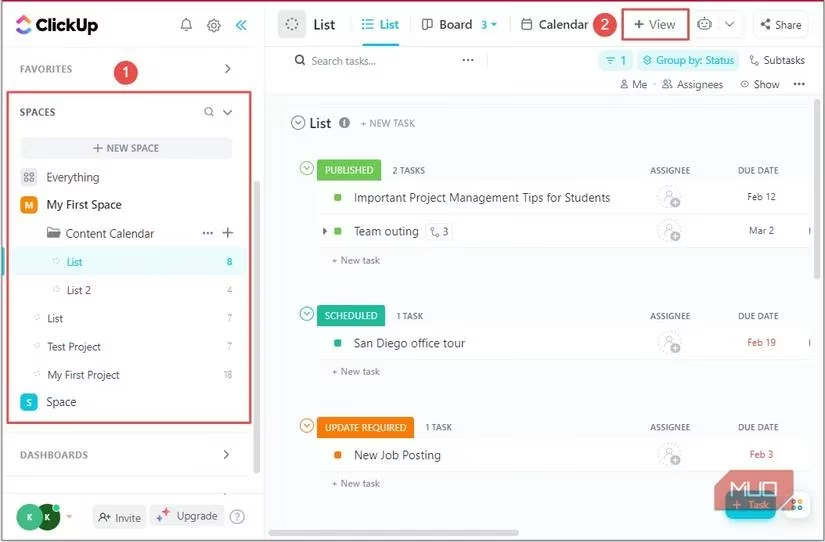
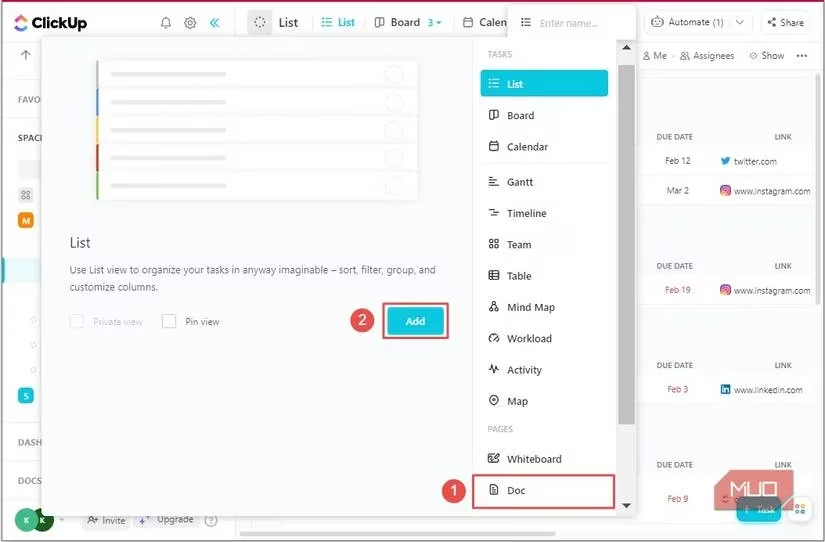
This method is convenient for keeping a document directly inside a specific location, but there is one big gotcha: if I delete that View, the document goes to the trash with it. I keep that in mind when organizing my workspace.
The second method is my preferred one because it saves the document in the default Everything Space, which cannot be deleted. I expand the Docs section in the sidebar and click ADD NEW.
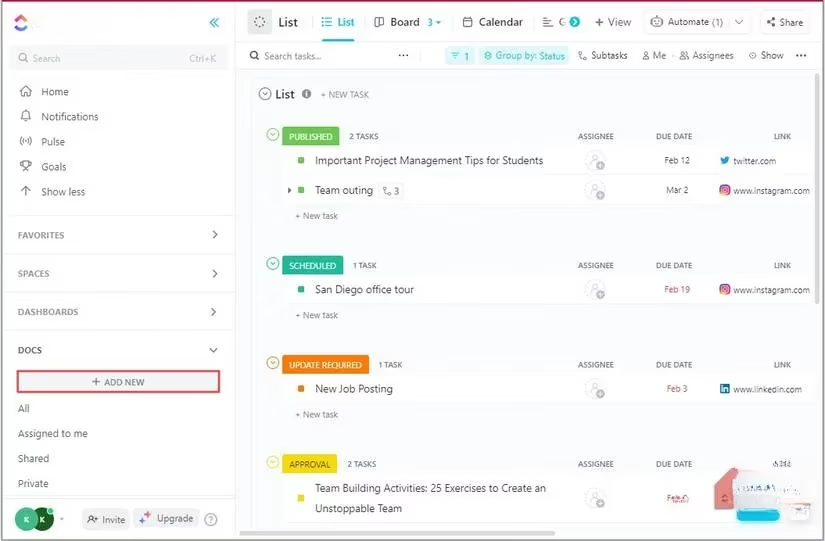
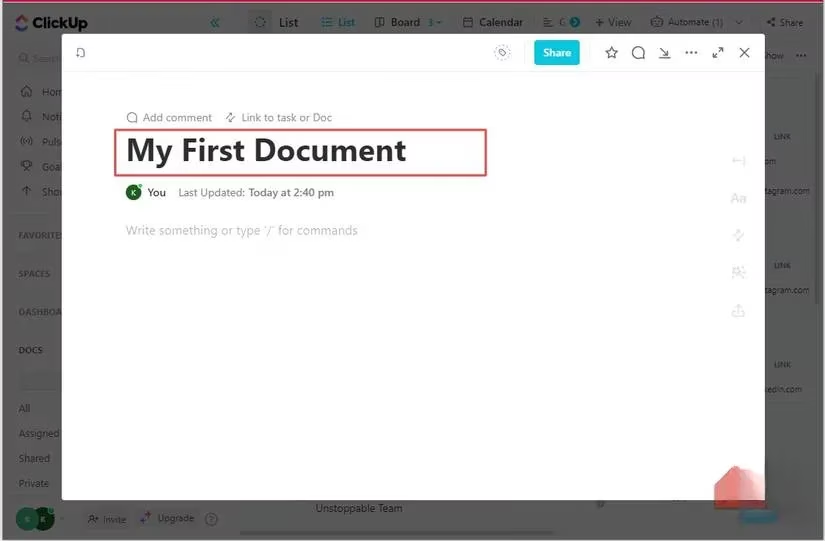
After adding a new doc, I give it a title, then hover over the title area to add an icon and cover photo.
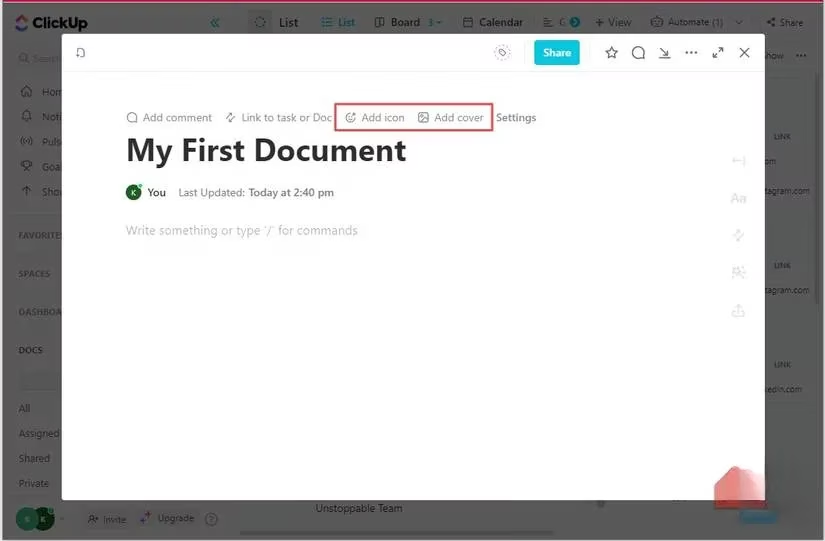
Here is a quick comparison of the two creation methods:
| Creation Method | Where It Saves | Pros | Cons |
|---|---|---|---|
| Doc as a View | Inside a Space, Folder, or List | Easy access within that location | Deleting the View trashes the Doc |
| Doc from Docs Sidebar | Default Everything Space | Cannot be accidentally deleted with a View | Slightly less contextual at first |
📄 Pages, Sub-Pages, and the Unlimited Canvas
One of the first things I noticed about ClickUp Docs is the virtually unlimited canvas space. It gives me plenty of room to add and organize content. I can also break the content into multiple pages by clicking the Add page button.
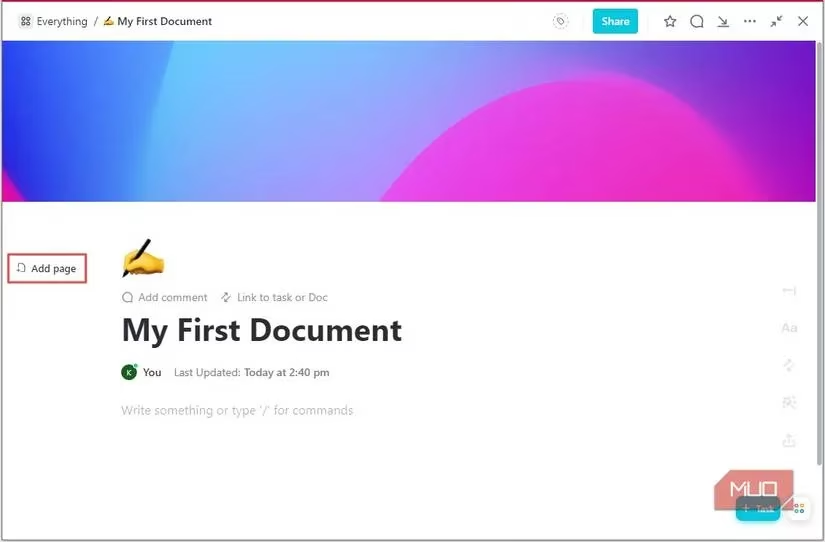
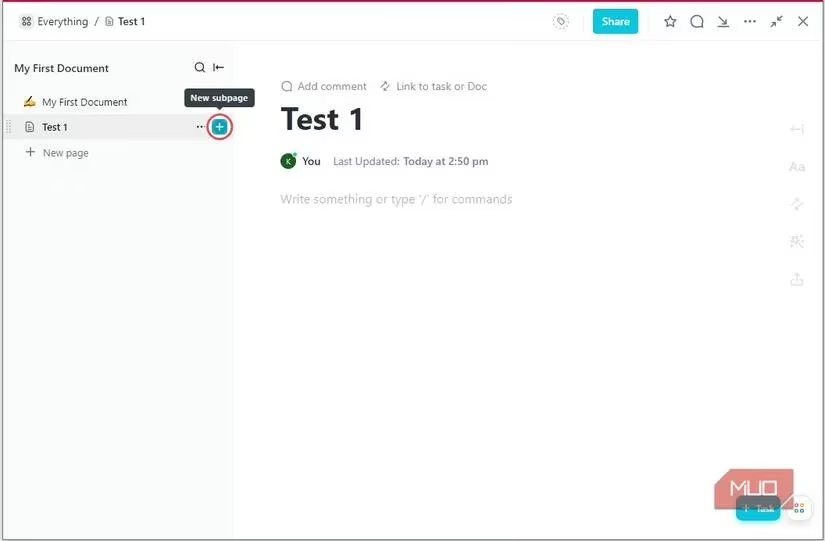
To create a sub-page, I hover over the page where I want to add it and click the blue + icon.
Clicking the ellipsis beside the plus icon opens a page menu where I can rename, duplicate, or delete the page.
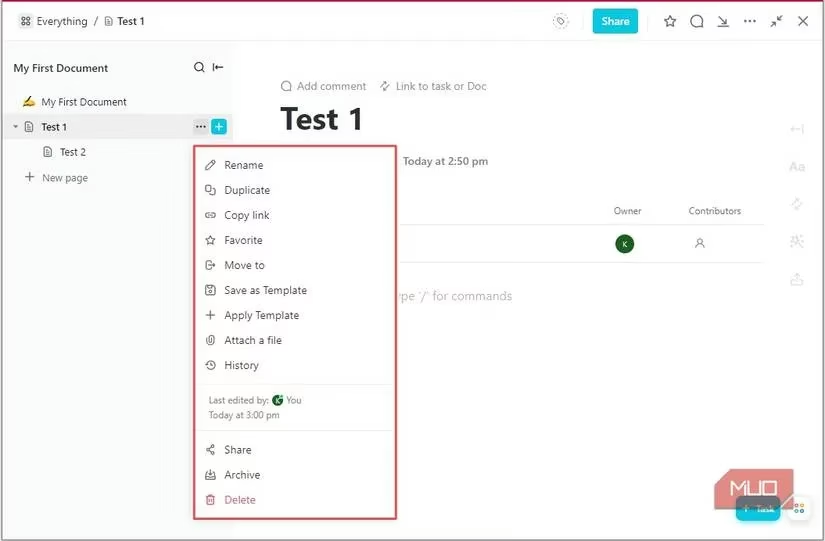
There’s no real limit to how many pages and sub-pages I can add, and each page can have its own unique icon and cover photo. This makes it really useful for creating a clean knowledge base or a structured strategy hub.
🧩 Saving Time with ClickUp Doc Templates
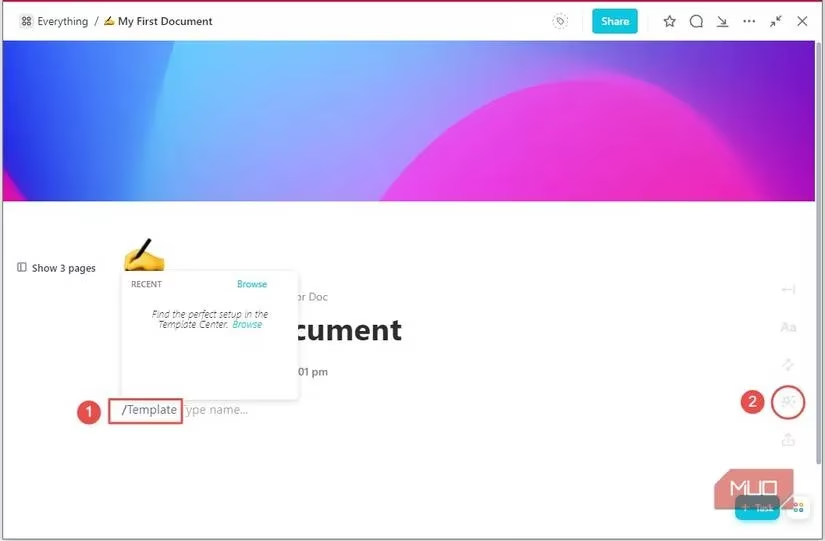
When I don’t want to start from a blank page, I use ClickUp’s pre-made templates. I can open the templates library by typing /template with the slash command and pressing Enter, or by clicking the wand button on the right.
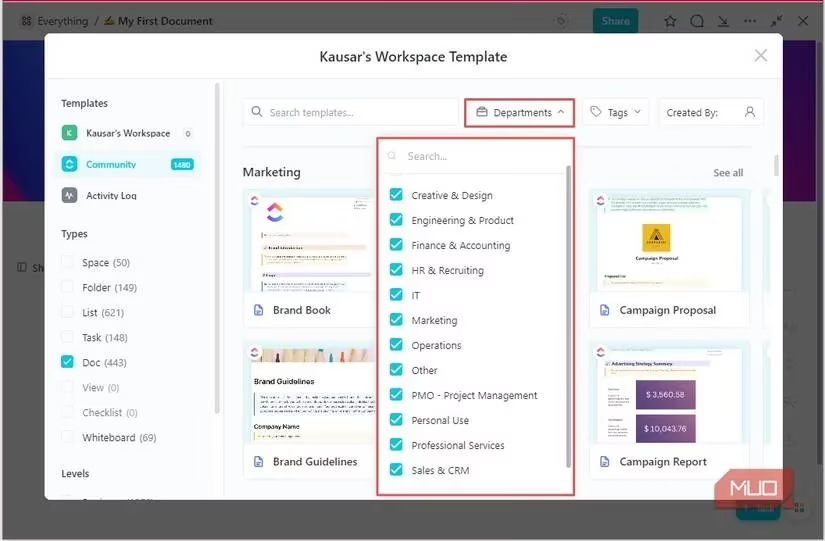
The template library covers categories like HR & Recruiting, Engineering & Product, and more. Each template is highly customizable, so I can tailor it to my specific needs, whether it’s a project brief, a meeting agenda, or a content plan.
✍️ Formatting Text and Using Slash Commands
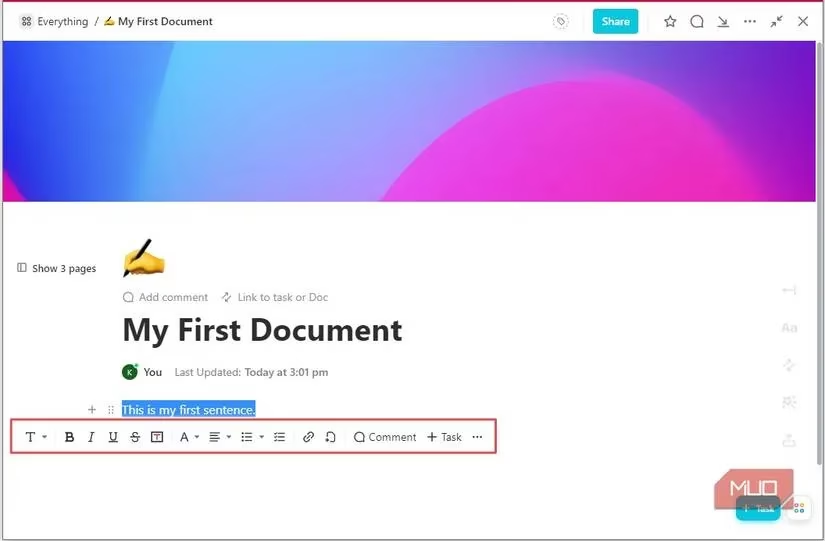
If I prefer to build content from scratch, I simply type directly into the document. When I highlight text, I get a range of inline formatting options to customize its appearance, leave a comment, or convert it into a task.
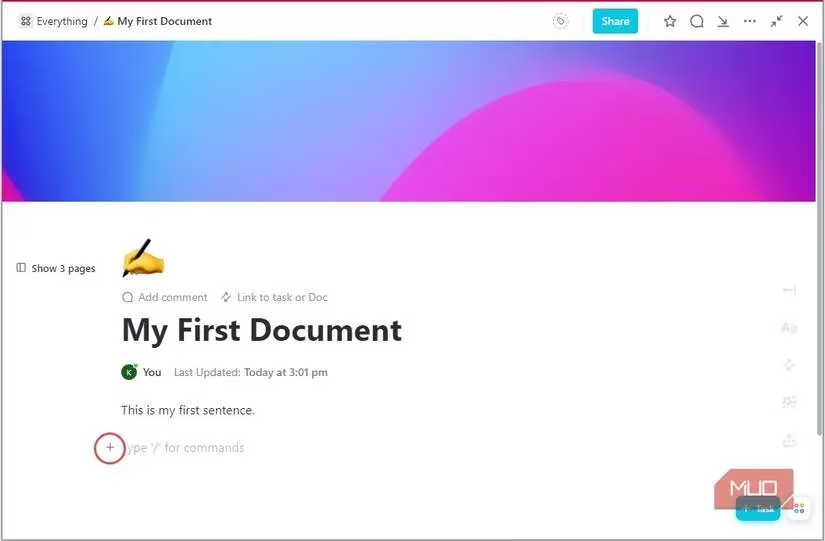
I can also hit the forward slash key or click the tiny + icon to open the slash command menu. This menu lets me insert different content types and embed stuff like Lists from my workspace, websites, Google Docs, or YouTube videos.
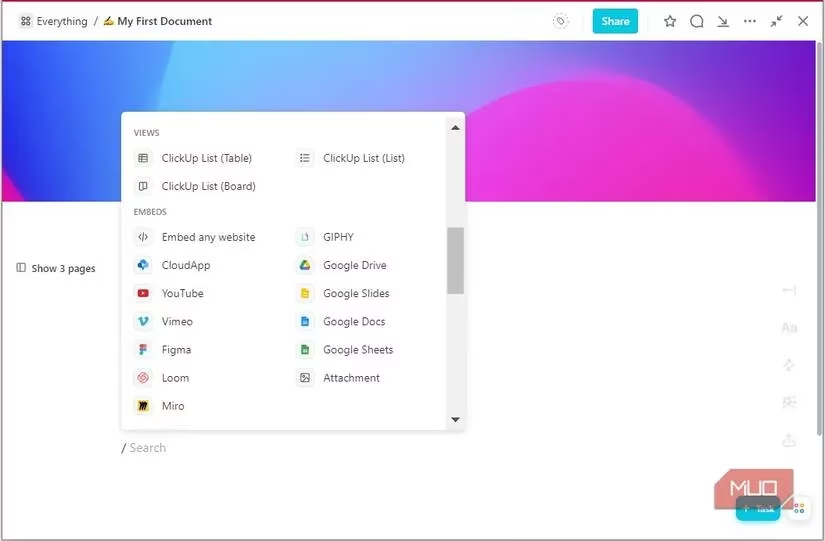
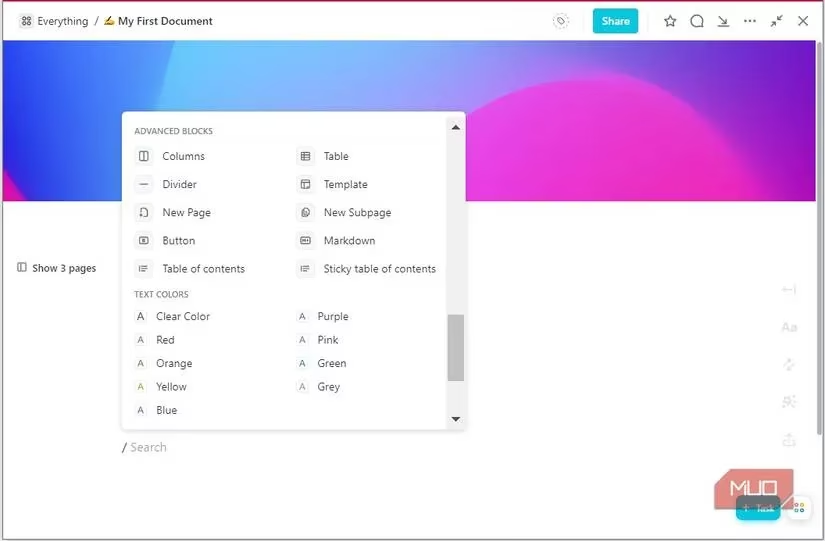
I especially like the advanced blocks because they help me organize complex information with columns, tables, dividers, buttons, and a table of contents.
🎨 Customizing the Look and Feel of a Page
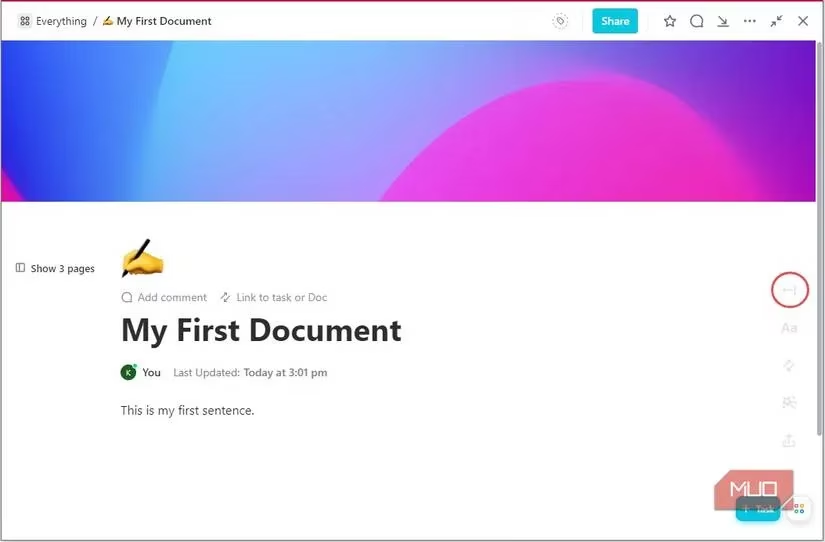
To customize the appearance of the page I’m working on, I first click the left arrow icon to open the sidebar.
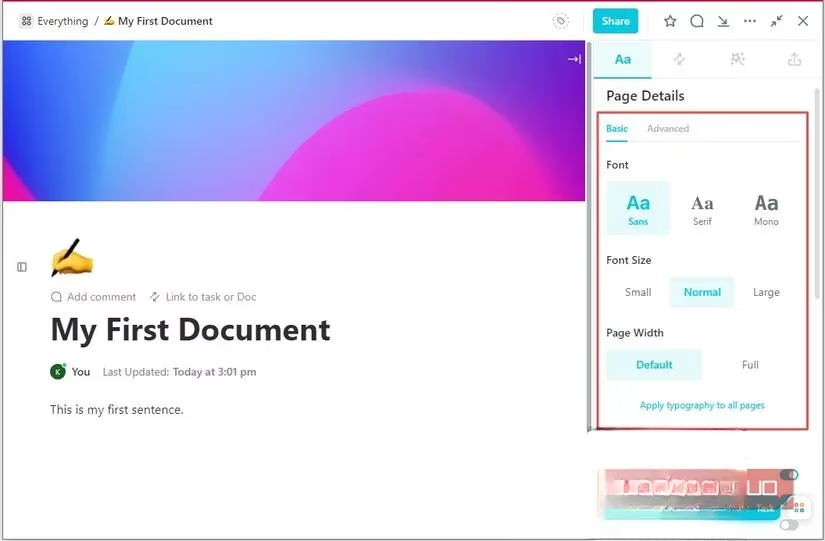
The top part of the Page details tab is split into Basic and Advanced. Both sections let me choose a font type and adjust the font size, line height, paragraph spacing, and page width.
Scrolling further down, I can customize the header area of my page. There are toggles for elements like the cover image, page title and icon, owner, and updated date.
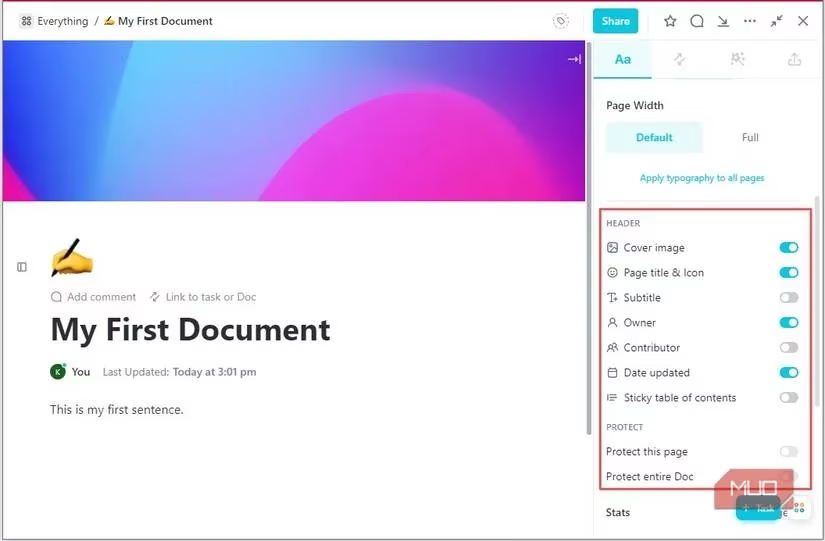
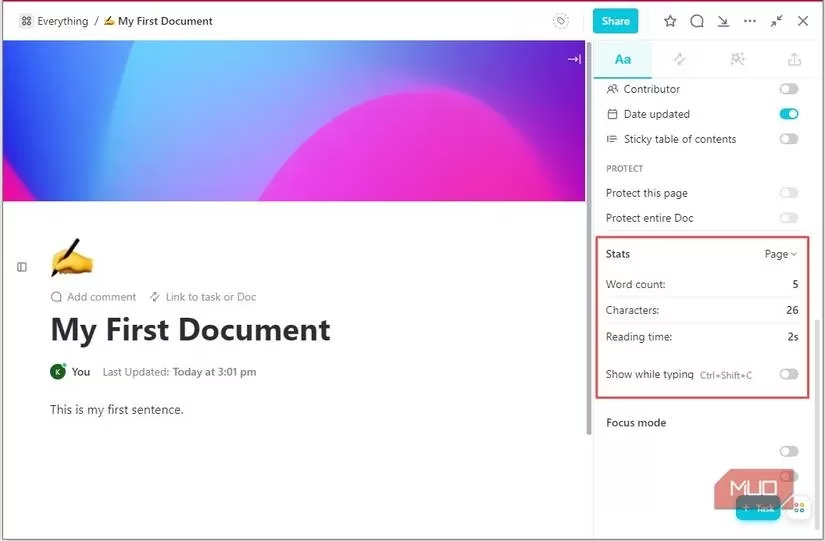
The Page details tab also includes a Stats section where I can view the number of words, characters, and the estimated reading time of my content.
🔗 Relationships, References, and Imports/Exports
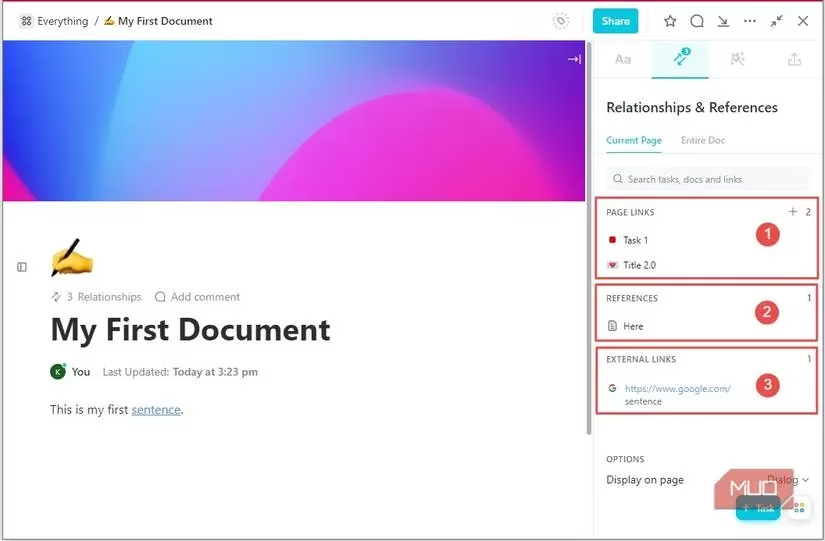
The Relationships & References tab helps me connect my current page to other tasks and documents inside ClickUp. It has three main sections:
-
Page links: I can use the + icon to link to any task or doc in my workspace. Linking creates a backlink, so I can access the current page from the linked areas too.
-
References: This is a compiled list of all the workspace areas where the document has been mentioned.
-
External links: This collects the external links used in the document.
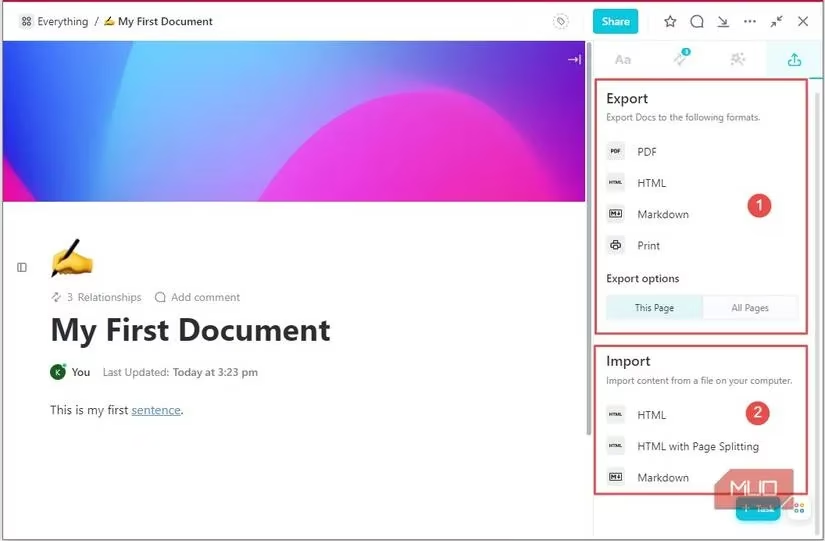
Under the Imports & Exports tab, I can import HTML files into a document and export a page or an entire document as a PDF or HTML file. This is handy for sharing polished versions of my team playbooks or proposals outside ClickUp.
🤝 Collaborating and Sharing
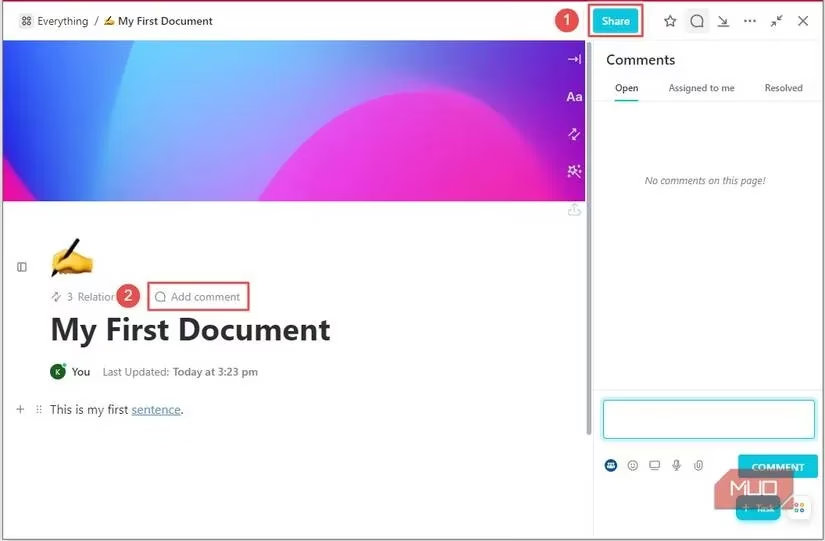
With the Share button, I can pick specific workspace members to collaborate with or share a link with people outside my workspace. The commenting feature also lets me engage directly on the document, and I can share files, voice notes, and screen recordings to make collaboration more interactive.
🏁 Final Thoughts
ClickUp Docs is a powerful and versatile feature that makes document creation, management, and collaboration much easier. Because it’s fully integrated with the rest of ClickUp, I can keep my tasks, references, and content connected in one place. If you’re already using ClickUp for project management, I highly recommend setting up a few Docs to streamline your workflows and boost your productivity.
This assessment draws from ESRB to highlight a practical checklist when publishing ClickUp Docs like team playbooks, scrim rules, or sponsor proposals: clarify any game-specific content descriptors, keep age-appropriate language in shared pages, and document compliance notes right alongside tasks and approvals. Treating your Docs as living policy hubs—complete with versioned patch-note summaries, linked match VOD tasks, and clearly defined access permissions—helps your org collaborate faster while staying aligned with rating and content-sensitivity expectations across platforms.
Comments