In the ever-evolving world of 3D printing, enthusiasts in 2025 are embracing smarter ways to keep tabs on their creations without constant screen checks. OctoPrint, that trusty application for remote control and monitoring, has been a game-changer, but manually opening an IP address in a browser feels like a chore from the past. Enter the DIY wireless OctoPrint monitor—a nifty gadget that brings real-time updates right to your desk, almost like a personal printer butler whispering secrets about your prints. This tiny device, built with affordable components, fetches crucial data such as elapsed time, remaining progress, bed and nozzle temperatures, and even weather info, all displayed on a sleek OLED screen. It’s a breeze to set up, and with advancements this year, it’s more accessible than ever for hobbyists aiming to streamline their workflow. Forget the hassle of refreshing web pages; this innovation turns monitoring into a hands-off delight, allowing users to focus on creativity while their printer hums away in the background.
What This Device Offers
Imagine glancing at a small screen to see everything about your print—no more guessing or interruptions. The wireless OctoPrint monitor, typically crafted from a WEMOS D1 Mini board and a 0.96-inch OLED display, connects seamlessly via Wi-Fi to pull data from OctoPrint's API. Key features include:
-
Real-time stats: Elapsed time, estimated completion with a progress bar 🕒, bed and tool temperatures 🌡️, and percentage done—all updated live.
-
Smart automation: It cleverly turns off the display when the printer is idle or disconnected, waking up only during active prints. Talk about energy efficiency!
-
Added bonuses: With OTA firmware updates, it stays current, and in 2025, users can even integrate weather forecasts for their location, making it a multi-functional desk companion.
This isn't just a tool; it’s like having a silent partner that keeps you in the loop without lifting a finger. Place it anywhere—your office, living room, or workshop—and enjoy peace of mind knowing your print is on track.
Essential Components for 2025 Builds
Building this monitor requires simple, off-the-shelf parts that are widely available today. Here’s a quick comparison of the core items:
| Component | Description | Notes for 2025 |
|---|---|---|
| WEMOS D1 Mini Board | The brain of the device, handling Wi-Fi connectivity | Now cheaper and faster with improved chips |
| 0.96" or 1.3" OLED Display | Shows all data in crisp detail | Higher resolution models are common this year |
| Micro USB Cable | Powers the setup | USB-C alternatives are gaining popularity |
| OctoPrint Server | Runs on devices like Raspberry Pi or old phones | Cloud integration options have expanded |
| 3D Printed Case | Houses the components | Custom designs are easy to find online |
Gathering these is straightforward—most can be sourced from local electronics stores or online marketplaces. For the case, 3D printing enthusiasts often share designs on platforms like Thingiverse, ensuring a snug fit. 🛠️
Step-by-Step Building Guide
Setting up this monitor in 2025 is simpler thanks to updated tools, but the core steps remain user-friendly. Follow this ordered list to get started:
- Download and Flash Firmware: Head to the printer-monitor release page and grab the latest firmware—choose based on your display size. Then, use the ESPHome Flasher tool (now with enhanced UI) to flash it onto the D1 Mini. Connect via micro USB, select the COM port, and hit 'Flash'. It’s a piece of cake!
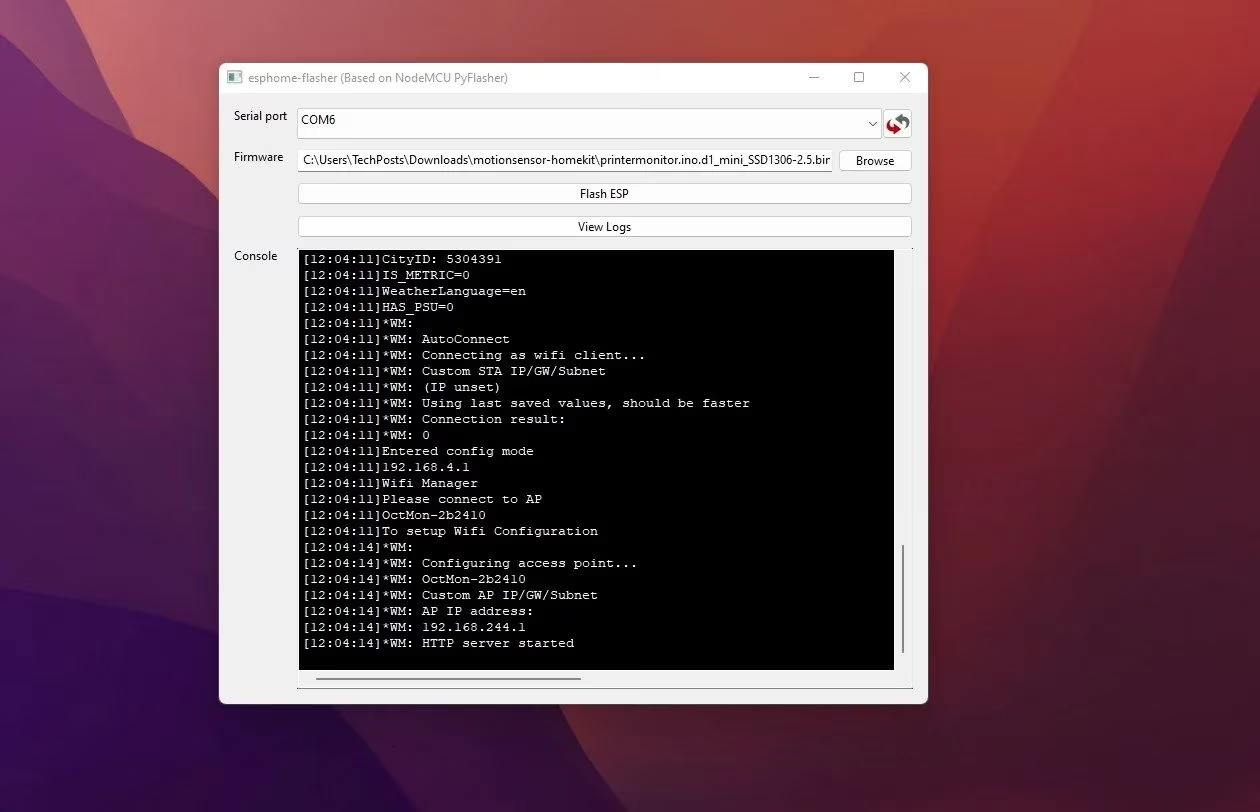
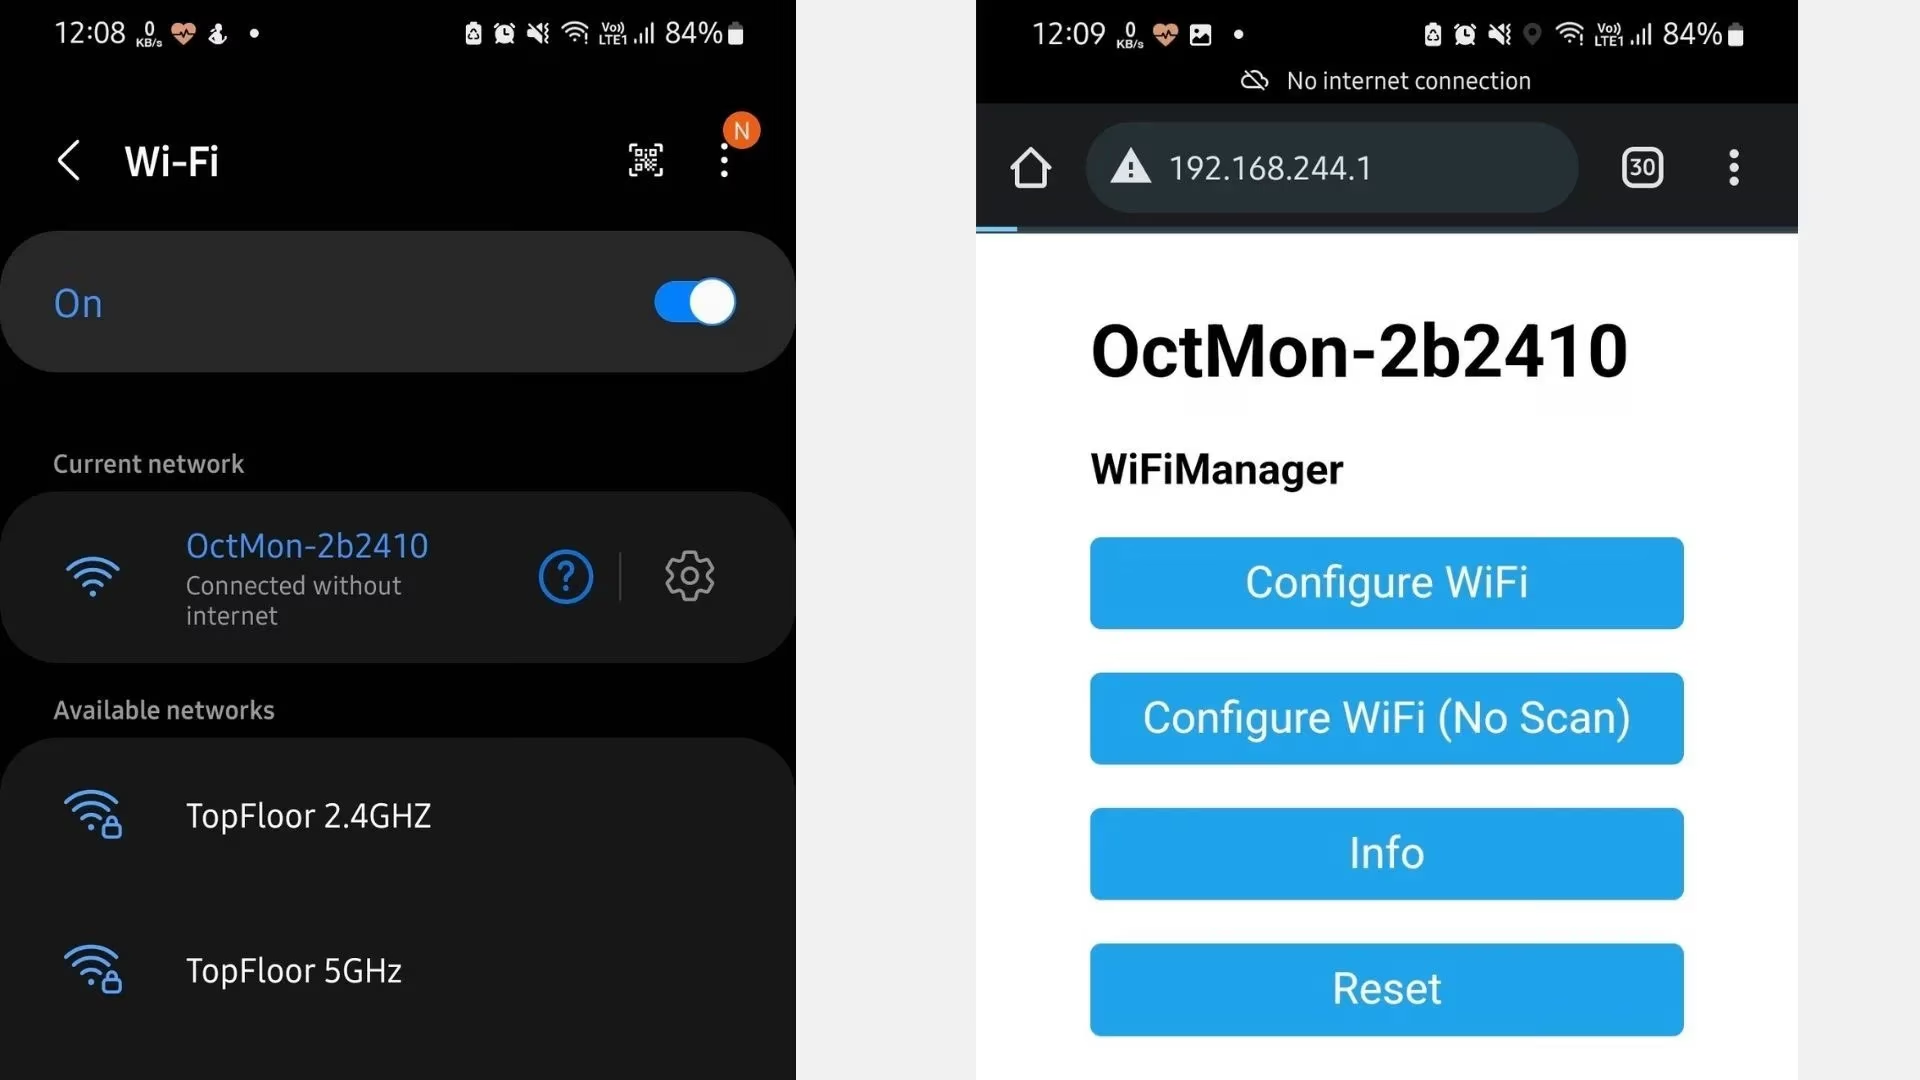
- Configure Wi-Fi and OctoPrint: After flashing, the device enters AP mode. Connect to 'OctMon-xxxxx' on your phone or PC, visit 192.168.244.1 in a browser, and set up your home Wi-Fi. Then, log into OctoPrint's web interface, copy the API key from Settings > API, and input it into the monitor. Easy peasy!
-
Add Weather Features: For that extra flair, sign up at OpenWeathermap.org, grab your API key and city ID, and enter them in the monitor's weather section. Now, when prints are done, it shows local forecasts—handy for planning your day.
-
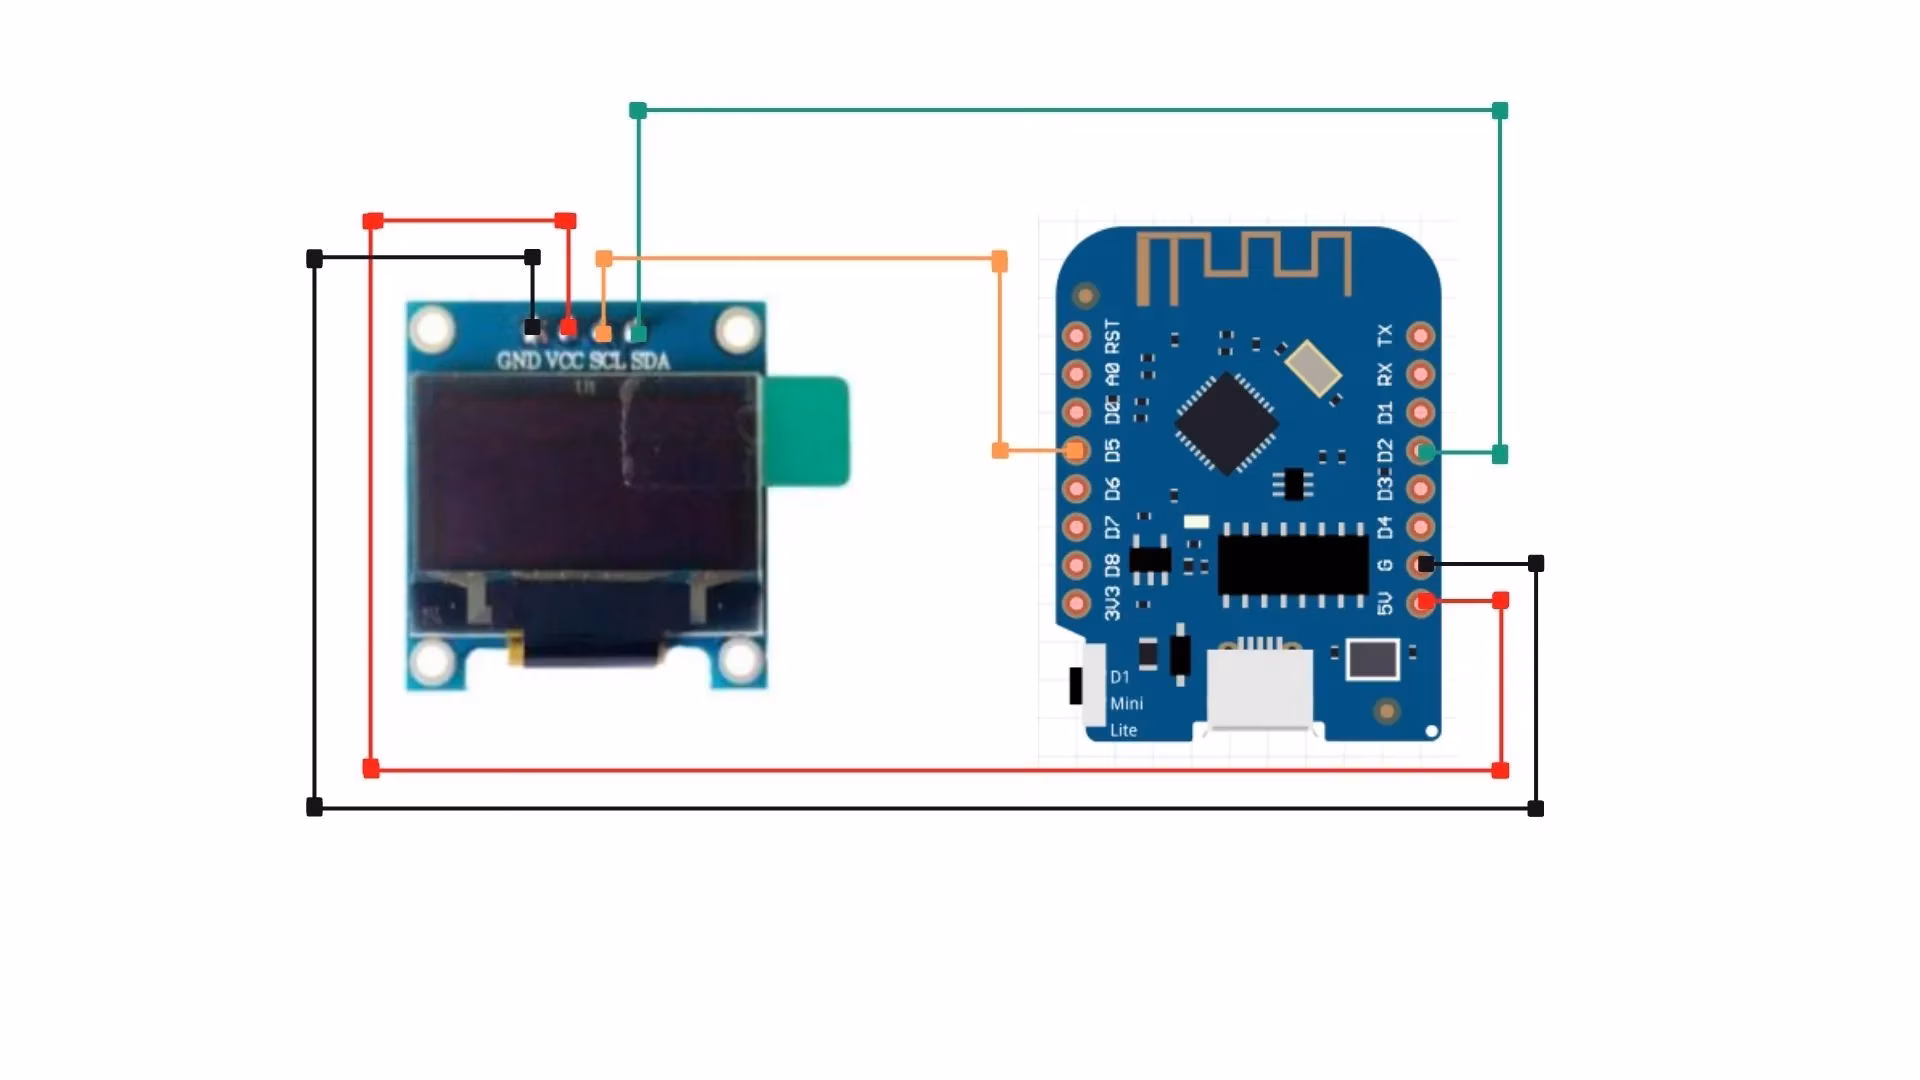
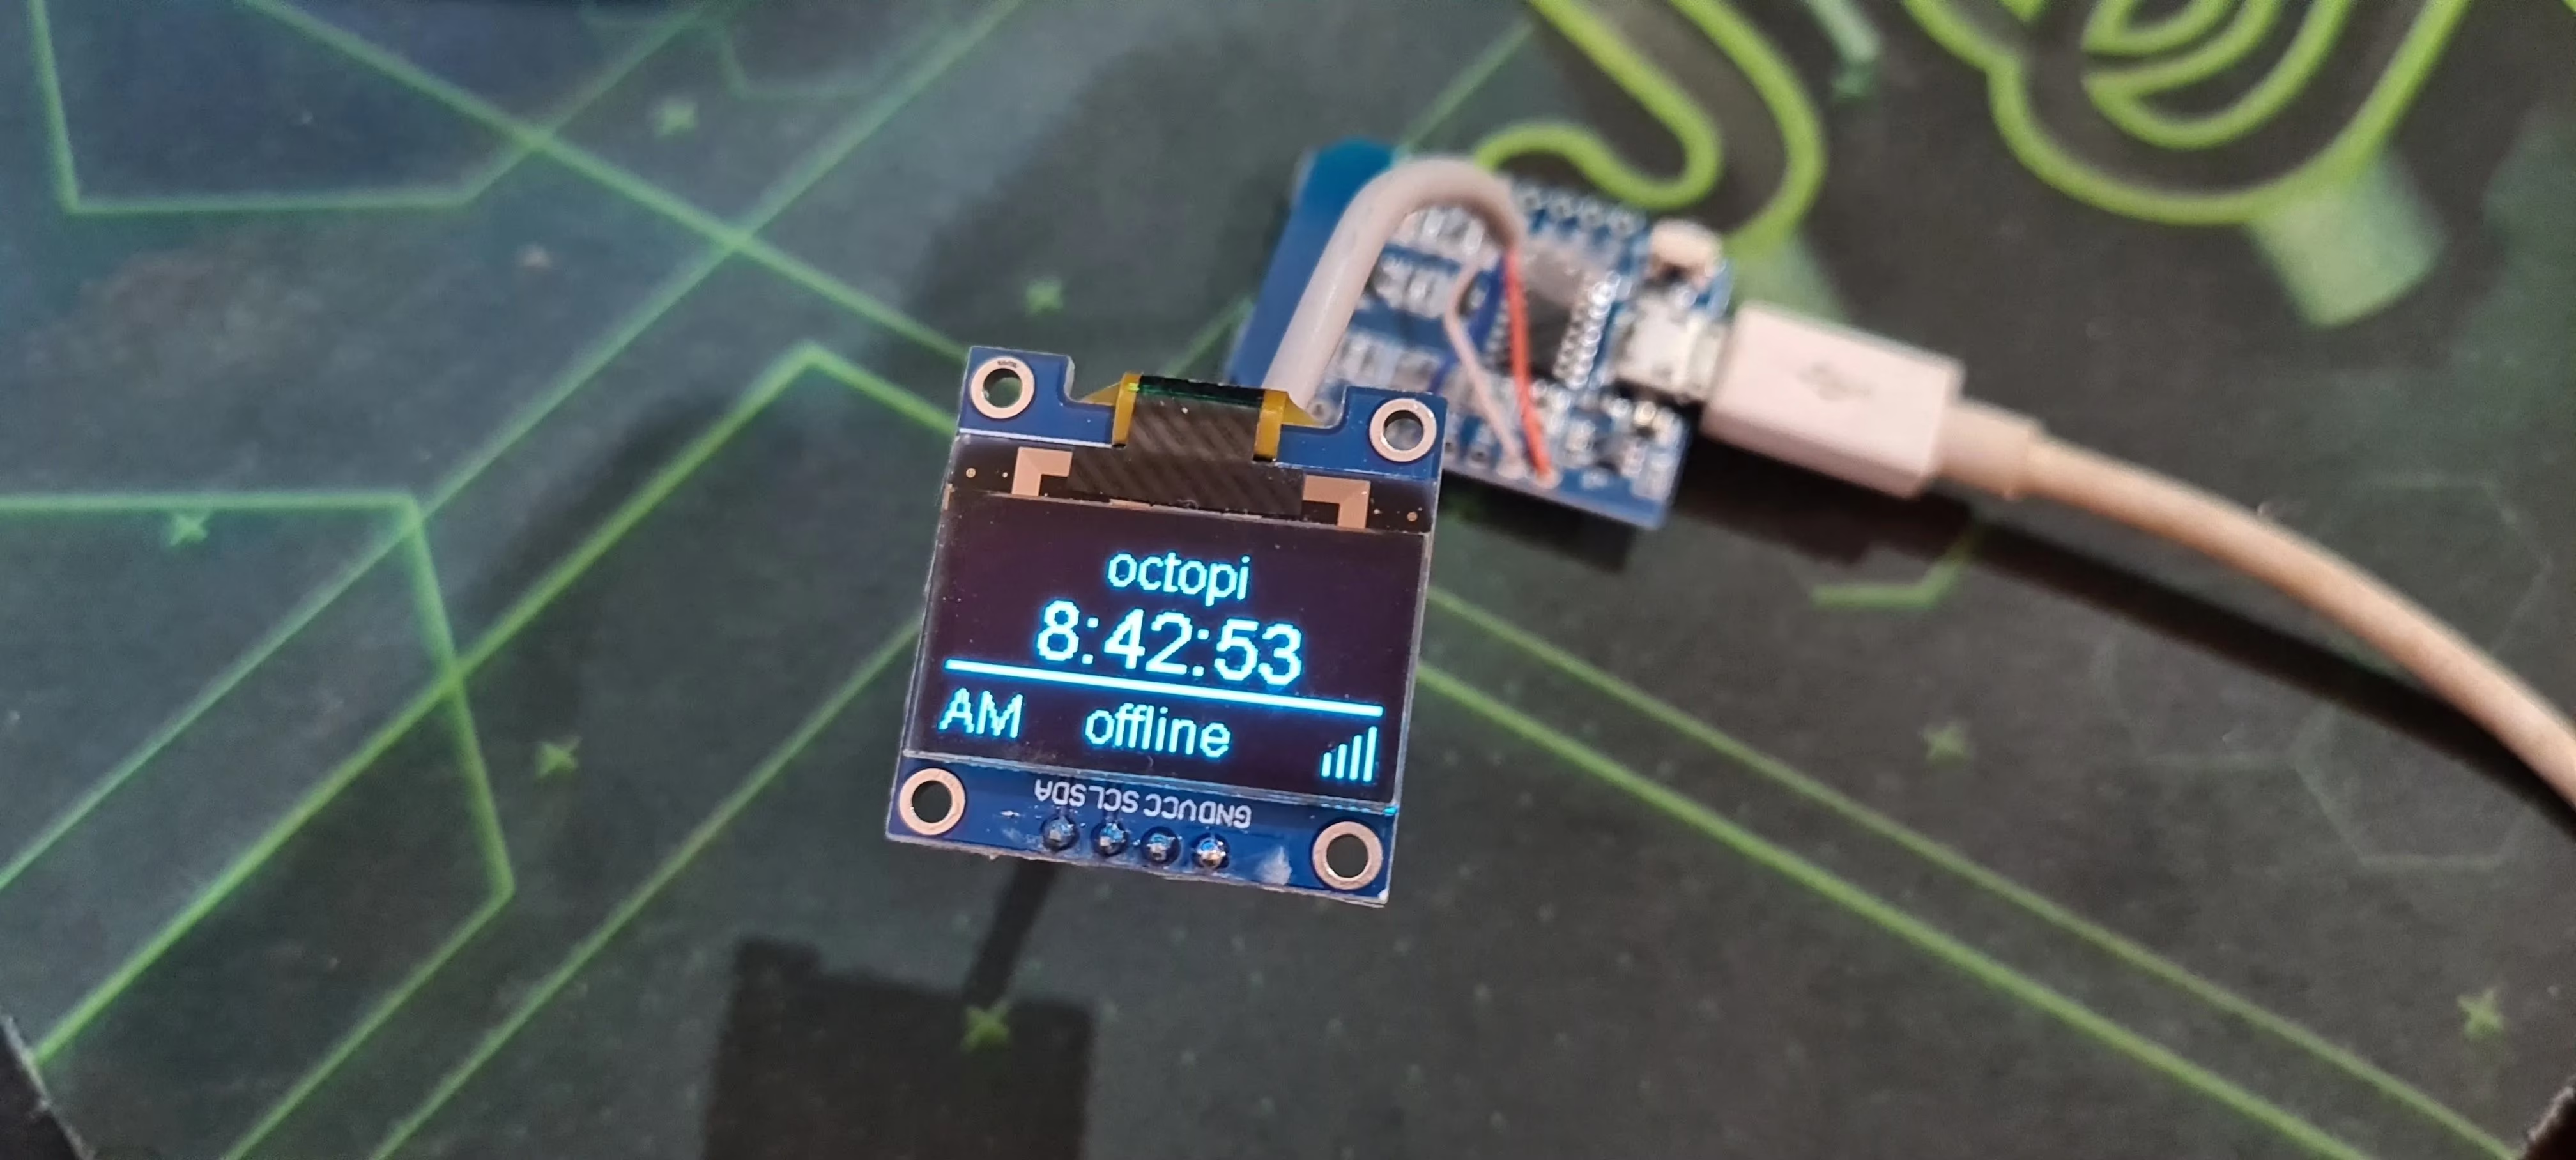
Assemble and Test: Wire the OLED to the D1 Mini: SDA to D2, SCL to D5, VCC to 5V, and GND to G. Use jumper wires as shown below. Secure it in a 3D-printed case with hot glue or tape, plug in a USB power source, and voilà—it’s ready!
Why It's a Game-Changer in 2025
This DIY project transforms how users interact with their 3D printers. No more constant browser checks; just a quick glance reveals if temperatures are stable or if a print is nearing completion. Build multiple units for different rooms—imagine one in your kitchen showing progress while you cook! Plus, with OTA updates, it evolves with your needs. In an era where smart homes are the norm, this monitor fits right in, offering reliability and simplicity. It’s not just about convenience; it’s about making printing joyful and stress-free. So, why not give it a try? Your printer will thank you.
Comments